
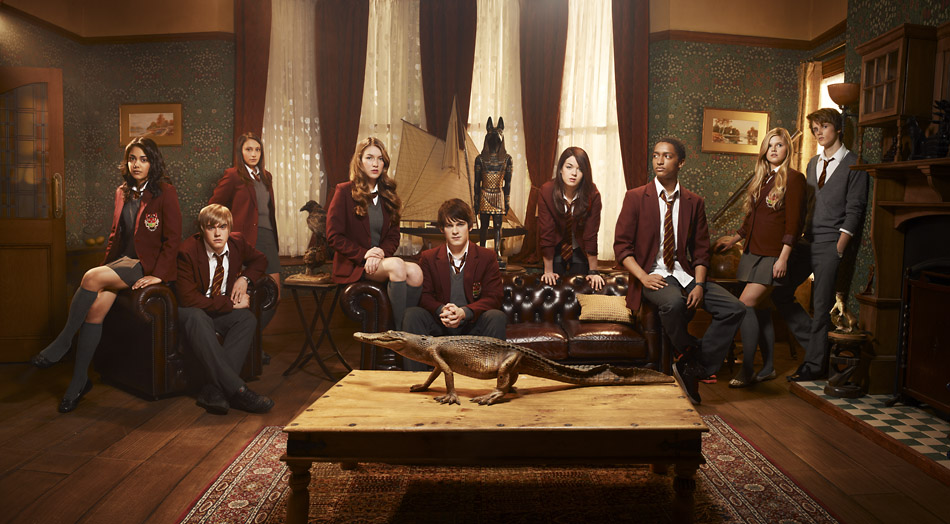
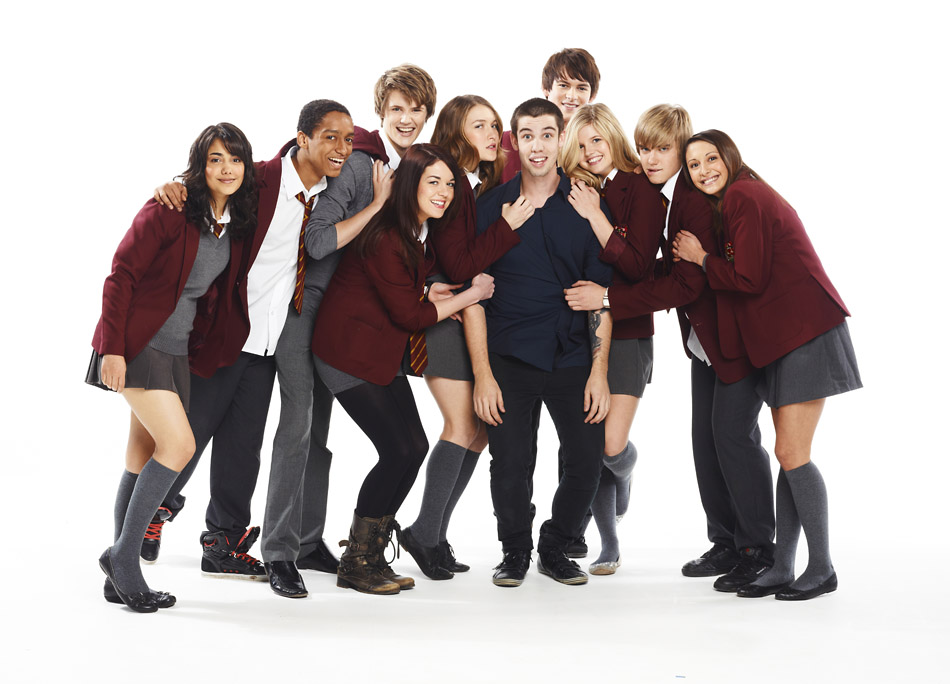
I flew to Liverpool, UK to photograph the advertisements and press shots for a new kids TV show called House of Anubis. I've always been impressed with the art direction (David Hamed) of Nickelodeon photo shoots. Even though they are shows for younger audiences, they really take a really in-depth approach to everything visual they do and put a lot of effort into production value. Working with these kind of creative people is a dream for any photographer. This is one of my favorite shots from my shoot...
Nickelodeon had a great set builder design and construct this set for filming the actual TV show, and I got to use it for my photo shoot. I love doing shoots on sets because they are designed for productions- there are trusses to hang lights, room outside to put lights through the windows… you really feel spoiled. For someone who is used to taping backgrounds to huts, this is like royalty. Sometimes a set can be a really confusing labyrinth of odd different rooms and you have to make sure you go to the bathroom in the real bathroom, as the fake one can look really convincing.
Lighting
Each lighting element is created and added tediously step by step. On shoots like this, a certain amount of time is alloted to “pre-light”. This is the day before the actual shoot, (or a few hours before) in which you have time to figure out how you’re going to approach the lighting setup and work out any bugs.

1) Main light
This started out as a Proglobe, which is a spherical “bulb-like” modifier which spreads the light around 360 degrees. When we first did a test shot with this, I didn’t like the way the light was spreading all over the walls. It was too bright and uniform- it didn’t look cosy, warm and moody like I wanted. To obtain what I wanted, I taped some black paper to the areas of the bulb where the light was over-spraying. This focussed the light only on the subjects, not the walls. I then added a sheet of diffusion paper to the bulb to further help soften the light from the bulb.
2) Rim lights
These backlights are beauty dishes with grids inside. Each is gelled with some 1/2 CTO orange warming gel. This created a nice warm glow from behind around the edges of the subjects, and helps separate them from the background. Since we have the illusion of warm window light shining behind the group in the shot, these particular lights help enhance that effect.
3) Additional back light
The actress on the far left of the image (Anastasia) needed an additional light to help her stand out in the dark corner of the image. This is just a standard head with grid and more 1/2 CTO gel. In the final picture, you can see the light flare, but I decided to keep it since it looks nice, and like it might be coming from an interior light in the house.
4) White bounce
The left side of the image wasn’t as evenly with the main light, so we added a white foam core bounce to help reflect some light back onto the two subjects in the chair.
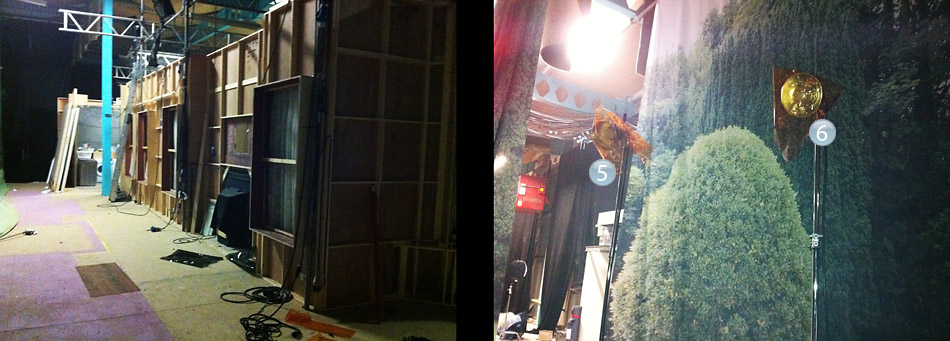
5+6) Outside lights
There are two lights outside the set windows to replicate a kind of sunset light coming in. It is supposed to look like one source, but really required two separate lights with zoom reflectors to create the effect since the windows are so far apart from each other. The cast on the far right of the image also benefit from this light since it helps define their pose by lighting the wallpaper behind them.
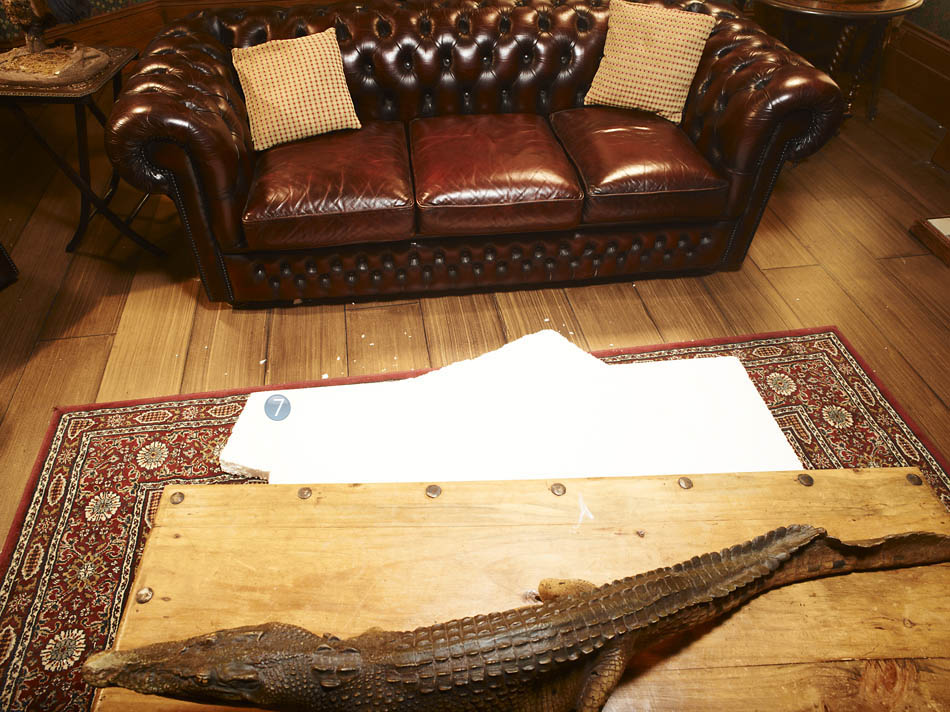
7) Additional bounce
There is a white piece of foam core hidden from the camera under the table. The purpose of this is to bounce some light back onto the bottom of their faces. The globe light (1) looks great, but casted too harsh shadows on their face. This piece of white helps even those out without effecting much else in the image.
EQUIPMENT LIST
LIGHT
6 Profoto standard Head, 4 Profoto 7a 2400 Air with built in Radio Reciever
LIGHT SHAPING TOOLS
1 Proglobe, 2 Silver Beauty Dishes with 25 degree grids, 1 20 degree honeycomb grid, 3 Zoom reflectors,1 White foamcore bounce
EXTRA ACCESSORIES
1 PocketWizard for camera, 4 C stands,1 boom arm,4 feet of CTO orange warming gel
CAMERA
Phase One P65+ DIGI back with Phase One / Mamiya 645 camera, 80 mm prime phase one lens, Panoramic Adapter
Execution
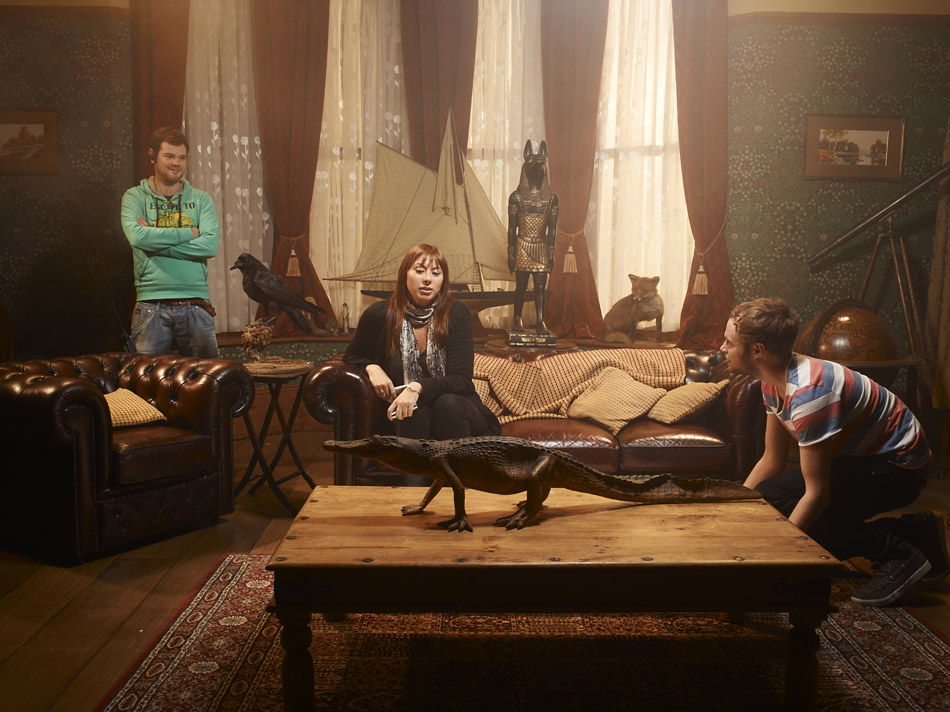
The prelight is always done with test subjects, not the actual cast. Now that I was happy with the way everything looked, it was time to pose the subjects. I had been working with the cast for 3 days on other shots prior to this, so at this point we were all very comfortable working together and it was easy to place them around and see what group composition worked best. Placing 9 people anywhere can be pretty tricky (well, 10 if you count the crocodile). I wanted to make variations of eye level and make sure nobody was sitting exactly the same way- some of the cast are sitting up high on the couch while others are lower, some standing, etc. I placed them one at a time until I was happy with the way it flowed to my eye. It was also important to leave spaces behind them so we could see some of the interesting props on the shelf.
With everyone posed at once, I shot the image in two separate panels. I did this for 2 reasons. The first is because I don’t like the look of super wide angle lenses, they distort the objects and people in a weird way and I want my images to be from a similar perspective as human eyes. When you merge two images together taken with a 80mm lens, it will have a completely different look than using a wide angle. I used a Panoramic Adapter to rotate the camera on the correct axis so I could combine the two images together later with a photo merge. I use this technique quite a bit on all my panoramic images, even in my personal work from Ethiopia. All the subjects are in place, but the camera is moved back and forth in two positions on each shot.
The show comes out soon, and I wish the cast and crew luck on the premiere!
JL
PS- And ooooohhhhh yeah, if you want to find out more about my photographic / lighting techniques, check out my new tutorial Sessions With Joey L. ;-)
ADD A COMMENT (75)
EA // December 08, 2010 00:19
stud.
Carson // December 08, 2010 00:20
Killer stuff, dude, thanks for sharing.
simone // December 08, 2010 00:26
wow, that's some serious lighting but what a fantastic result!! It exudes warmth and moodiness just like you wanted - love it Joey.
Jacob Niblett // December 08, 2010 00:32
Hey Joey, The shots look great and thank you for sharing your set up.Great work!
Sterling // December 08, 2010 00:35
Great post, thanks!
Jesse Rosten // December 08, 2010 00:48
Great image. Thanks for sharing the behind the scenes. Stitching the photos is a great solution to eliminate wide angle distortion.
Kadu Schiavo // December 08, 2010 00:50
wtf!! oh man! great job! great light! thanks a lot for sharing with ussorry about the poor english
Fred Smith // December 08, 2010 00:54
Great post Joey. Please keep these types of posts coming. Love the bts stuff.
Jeff // December 08, 2010 00:56
Fantastic as always, Joey. Thanks for sharing the setup!
Casey // December 08, 2010 01:10
I love the behind the scenes set up shots! This is amazing and great work.
denisse // December 08, 2010 01:19
yep, thanks for sharing!!and you look awesome with that haircut :*
Matthew Snyder // December 08, 2010 01:23
http://www.laurentauxietre.com/?page=3
Adam Jacob // December 08, 2010 01:24
Amazing post Joey!!! Lets see some more of these kind of post from you!!
Keri Doolittle Photography // December 08, 2010 01:26
Excellent post, thank you for sharing!
denisse // December 08, 2010 01:34
aaahhh ... and a question... how many photos did you take with this group? my brother always shoots hundreds even if they look exactly the same
Nick // December 08, 2010 01:34
Joey,
Great post as always! Quick question. On B&H it states that the panoramic adapter you linked to is for compact point and shoots. Is that still the one you used? Is it sturdy enough?
Thanks!!
Matthew Snyder // December 08, 2010 02:21
http://www.laurentauxietre.com/?page=3
Julius Koivistoinen // December 08, 2010 02:21
Hi from Finland!This kind of a quick and dirty BTS post is great. It's easy to read through but is very informative at the same time.The result came out awesome! I'm really envious how cool sets you get to shoot at. :)
Kevin Visitacion // December 08, 2010 02:44
This is awesome! How I wish i can do this!
Shaun // December 08, 2010 03:00
I know you were asking around on what people were looking for in your blogs posts.....you nailed it. Great stuff. Simple, quick, and informative behind the scenes. thanks man
Aloha // December 08, 2010 03:28
Yeah Joey! Thanks for this post. You're brilliant by the way, but then you probably get told that every day. Cheers and post some more of this stuff!
Eugene // December 08, 2010 04:41
Wow, amazing lighting. Thanks Joey!
Alex // December 08, 2010 04:56
I really love the way you do things.
dario milano // December 08, 2010 05:08
Fantastic work and thanks for sharing your set up in such a detailed way; very inspiring.All the best, Dario
Winston // December 08, 2010 06:02
Awesome photo, that is one complicated lighting set up but results are fantastic
Tkae // December 08, 2010 06:23
You are a star.. love your work...but I cringe when u say CTO Orange Warming Gel..It's like David , Zack and Joe are cracking up somewhere by not correcting u..
Peter hearl // December 08, 2010 08:46
Nice job joey. a serious amout of lights.
Henry // December 08, 2010 11:24
This is great stuff Joey!! Thanks for sharing this kind of information. easy to read, even for people from Europe. I know that the house of Anubis was a big hit in The Netherlands.Nice solution with the stitching of the 80mm images, but on my screen there is still a bit of distortion in the background. The boarding on the backwall is still not horizontal. Nevertheless it is an image that is very well thought en I don't think that I'll never be able to make such a great image.
Brett Harkness // December 08, 2010 16:06
Great work as usual Joey. Next time your in the UK give me a shout, I'll show you around Manchester and have a beer or two!, cheers, Brett
Oleg Palchyk // December 08, 2010 16:07
Great!!!
Agustin Sellhorn // December 08, 2010 16:12
Thank you for this excellent class Mr. JoeyI would had done a few things different:The hole lighting setup is trying to mimic thesun coming from behind and filling the room with light witha special mood. So I would eliminta that flare from the darker side of the picture (I dont think that a regular house light bulb can iluminate that much with the sunlight filling the room) and introduce some flare from the other side where is hotter and looks like the sun is in that way.and maybe some fog
Alastair Bell // December 08, 2010 16:18
cracking image! love the walkthrough on how it was lit, you make it sound so simple!
Mark Blundell // December 08, 2010 16:19
Agree with other comments - really good blog post, great to see 'how the pros do it' the explanation is great and very well written - more of the same please!
Freddy // December 08, 2010 17:31
Thanks for sharing your tricks of the trade, always looking forward to seeing more of your latest photography.
Eric Seilo // December 08, 2010 18:13
Thanks for the post! I really enjoy your contribution to the space. Would love some BTS video footage of shoots like this!
Samantha Nandez // December 08, 2010 21:41
This is a great walk through and a wonderful explanation of how you used your lights. Thanks very much for sharing. And I completely agree about the wide angle lenses. They have a great use for somethings, but the distortion gets on my nerves, haha. ;)
Steve Glass // December 08, 2010 23:22
This is such a great post! Thanks so much for all the detail on the lighting setup and telling us about the pano head! Keep 'em coming man. So glad to see you working so much!
Daniel Fritz // December 09, 2010 02:04
I loved reading through this and loved seeing how much detail you gave us. Coming from a film background, I always love seeing how other genres of photography are setting up their lighting. Congrats on the shoot and I look forward to more updates! =)
Marc // December 09, 2010 09:24
Yeah, that's cool. Thanks for sharing. Well, but the wall on the right side looks a little strange. ;-)
andrea // December 09, 2010 09:35
Someone already asked this, can you tell us more about the panoramic thing. how many photos did you take? only horizontal panning ? how did you get the people not moving between one shot and the next ? can you show the different stills before the stitch ?thanks!andrea
DrE // December 09, 2010 10:37
Hi Joey! thanks a lot for sharing with us yours technicals and all these insider informations. In that case I'm curios why you decided to use beauty dish instead of some softboxes which for me would me natural choice.btw - merry Christmas!!
Rameez // December 09, 2010 18:36
Great stuff Joey, love the lighting setup and the creative thinking behind it. Its what sets you apart. Would have been awesome to meet you in Liverpool hope the snow and ice didn't give you too much of a hard time mate!-Rameez
numbeos // December 10, 2010 09:04
As always, it's so wicked ! Thanks for your sharing...
Spencer // December 10, 2010 22:03
Thanks so much Joey, great post. I love behind the scenes stuff like this, super helpful.
Kristofer Lönnå // December 11, 2010 11:32
Great post!If you like the ProGlobe you should look into the Chimera Lanterns, comes with a black "skirt" so you don't have to use black paper. And it's bigger too ...http://www.chimeralighting.com/Products/Film-Video-Lightbanks/LanternsLove your work! Maybe you could come as a speaker at our yearly event for photographers here in Sweden. We've had Albert Watson
Nacho Santes // December 11, 2010 16:36
Extraordinario trabajo, admirable de tu parte que compartes tu conocimiento, espero que algún dÃa vengas a México.Muchas Gracias.
Debbi // December 12, 2010 22:27
Do you have any idea what that thing is called (officially) holding the large foam core board. I need something to hold mine up but don't know what to google.Love the setup stuff JoeyThanks so much for taking me on this fabulous journey with you!Debbi
Melissa // December 13, 2010 06:00
Thanks for being so willing and open to share your techniques. While you give as much detail as you can, nobody will be able to replicate your style and what you give back to the people you work with and the photo community! Awesome work!
Jason the Saj // December 16, 2010 17:55
Hey Joey,Regarding the panoramics. Any chance you could post up the before/after shots so we can see what the two separate shots look like before being merged?- Jason
Faisal // December 18, 2010 23:49
man you are just too good. great photo i am really big fan greeting from Saudi arabia
Ãlvaro // December 19, 2010 06:55
I admire your work, really great photos. Congratulations man! I hope to see more of your work.
Ivan // December 19, 2010 07:09
Love your work.I just want to add that 'House of Anubis', was first created in Belgium (my home country) by www.studio100.be and here and in The Netherlands. Studio100 sold the format to Nicklelodion.
matt blassey // December 20, 2010 20:32
great post. i appreciate you taking the time to layout and explain your lighting layout and process. great dynamic lighting.
Andrew D // December 29, 2010 15:50
Joey, the only thing better than the result from this session was the way you explained it. You're an excellent story teller. Just a thought, since you seem to like using a stitched normal panes to create your wide format portraits, have you considered using a shift adapter instead of a pano head. It would probably give you a little less curved perspective and might give you the immersive look you are going for.
Andrew D // December 29, 2010 16:05
Or you might even try a 617 format film camera with a 90mm lens. Could be a good look for you or just something to experiment with in all of your spare time.
Gerard // December 29, 2010 22:48
I just saw your film: "Faces of a Vanishing World" AWESOME ! Inspiring, touching and moving,funny and BEAUTIFUL. Going back took it to a whole other level; your ART brought to life to the nth power!You Rock !!!!!:)
Peter Hearl Photography // January 03, 2011 12:03
Another great job joey, love the lighting
kfir // January 08, 2011 02:06
thanks for sharing
cheap coach bag // January 08, 2011 03:49
I want to directly grab your rss feed to stay informed of any updates, but I cant find it, do you have one?
Fotograf // January 15, 2011 11:23
Hard work with a lot of people. You managed it excellent and got a great photo.I only don't like harsh reflections on the sofa, I would kill it a bit in the post...
Csaba // January 15, 2011 20:00
Very impressive shot. i just found your blog, but will definitely read through it.
COE // January 20, 2011 09:11
Joely...you're the absolute light genius all over the world!I'm still studying and learning from you and your sets 'cause you're a totally inspiring teacher!I hope I'll be able to obtain something at your incredible high level a day! ;)Thnx for sharing your art and your set.up schemes!I'm honoured to follow you!COEwww.comalab.tk
jins // January 21, 2011 08:18
its really nice set up and info! thanks
House of Anubis – Joey L « Patricia McMahon Photography // January 21, 2011 12:15
[...] See below for Joey L’s new press image for Nickelodeon’s brand new show “House of Anubis”, shot on location in Liverpool UK. The show is a recreation of the popular Belgian TV show “Het Huis Anubis“, and is set in exclusive boarding school in England. The shoot took place on the set of the show, and you can read Joey’s behind the scenes post here. [...]
Mattie // January 28, 2011 00:57
Why don't Nina and Fabin kiss all ready there so made for each other and clearly they love each other.the way he looks in her eyes the ways she smiles at him .Since the first episode he's been there for her . I love house of Anubis <3 :) Nina and Fabin forever<3
MAZZA // March 03, 2011 12:26
HEY ANUBIS FANS THE NEW EPISODE IS ON EVERYDAY AT 5 AND IF U MISS IT CATCH UP WITH AT 6 ON NICKELODEN REPLAY
mazza // March 03, 2011 12:30
why dosent amber just kiss mick and make up with him dont u think nina and fabin should just kiss and go out
BGoosen // April 23, 2011 19:51
Hi Joey! I noticed others have asked you the same question in the comments above but you've since failed to clarify or answer it so I'm going to pester you: given the panoramic adapter link you gave to B&H website. That plate is designed for compact cameras and too light for pro slrs, let alone a Phase One camera, which is the camera you used. Could you please give details on how you oriented the phase one with the this plate to generate the panoramic shots? I look forward to your response. We are all here to learn:).
ceri // June 19, 2012 22:39
i love house of anubis sooooooo cooool i hope they make a third series <3 <3 <3
lauren // June 23, 2012 14:46
you have been getting my dreams i swer i love you gues soooooooooooooooooooooooo much
carlettte // August 29, 2012 13:03
i love house of anubis
Rey // January 17, 2013 11:10
cool, nice info <3 thanks for sharing :D
ADAM GARCIA // February 23, 2013 03:04
I wanna be on the house of anubis i could act i love this show i would die for it, let me be in at least one show seriously please!!!!!!!!!!!!!!!!!
nawal // January 28, 2014 20:29
I love your TV show is on of the best TV shows on Nickelodeon so you should make more shows of house of Anubis and I like Nina amber Fabian mick Mara Alfie Jerome patricia and Victor and Jason Winkler so I hope you do
PS I love Jerome and Alfie
albert // October 22, 2018 23:40
You have shared all the useful ideas here. To know more, you can visit https://canonsupportnumber.org/canon-tech-support/
Your comment has been posted